Building a Lantern
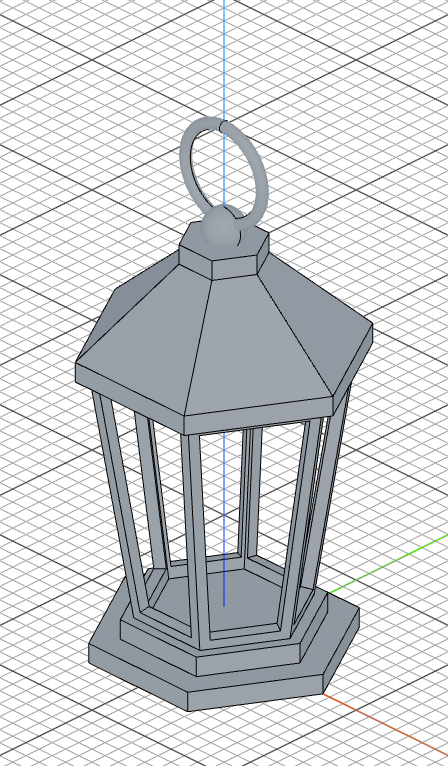
In this tutorial, you'll build a hexagonal lantern from scratch, based on the original design by TooTallToby. It covers a wide range of FluidCAD features: polygons, draft extrusions, shelling, projecting geometry, pattern cuts, lofting, and revolving.
Create a new file called lantern.fluid.js in your project.
Setup
Start with imports and some variables that define the lantern's dimensions. Using variables makes the model parametric — change a number and the whole lantern updates.
import {
    axis, circle, color, cut, extrude, loft, move, offset,
    plane, polygon, project, repeat, revolve, select, shell,
    sketch, sphere, translate
} from 'fluidcad/core';
import { face } from 'fluidcad/filters';

const sides = 6;
const draft = 8;
const windowOffset = 6;
const wallThickness = 7;
const middleHeight = 150;
sides— number of sides for the lantern's cross-section (hexagonal)draft— draft angle in degrees, so the body tapers as it goes upwindowOffset— how far the window cutouts are inset from the face edgeswallThickness— wall thickness after shellingmiddleHeight— height of the main body
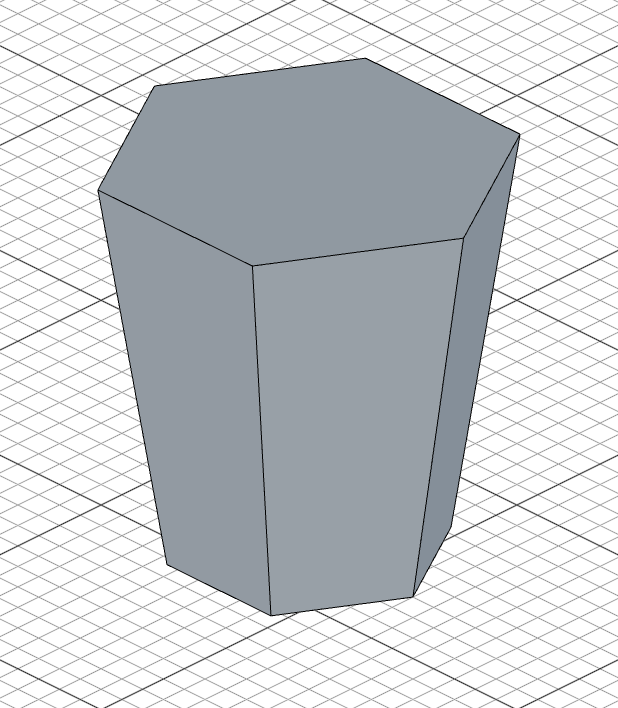
Step 1: The middle body
The lantern's main body is a hexagonal prism with a slight taper and hollow walls.
Extrude with draft
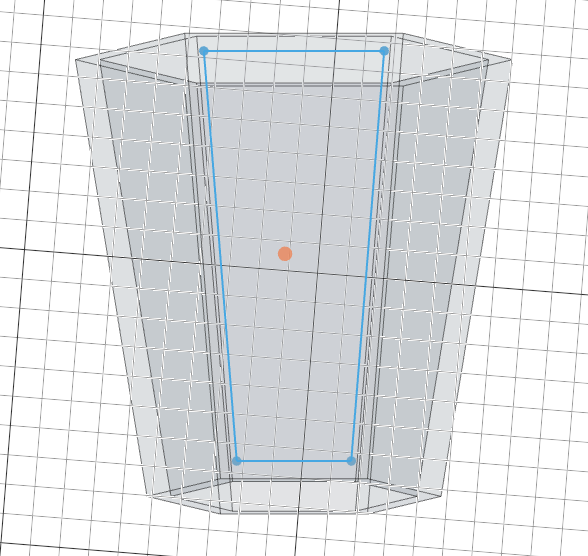
Sketch a hexagon on a plane that's offset 24 units above the origin (to leave room for the base below), then extrude it upward with a draft angle. The .new() keeps it as a separate solid — we'll need to reference its faces later without interference from other parts.
sketch(plane("xy", { offset: 24 }), () => {
    polygon(sides, 100);
})

const middle = extrude(middleHeight).draft(draft).new()

The draft angle makes the hexagon slightly wider at the top than the bottom, giving the lantern its characteristic tapered shape.
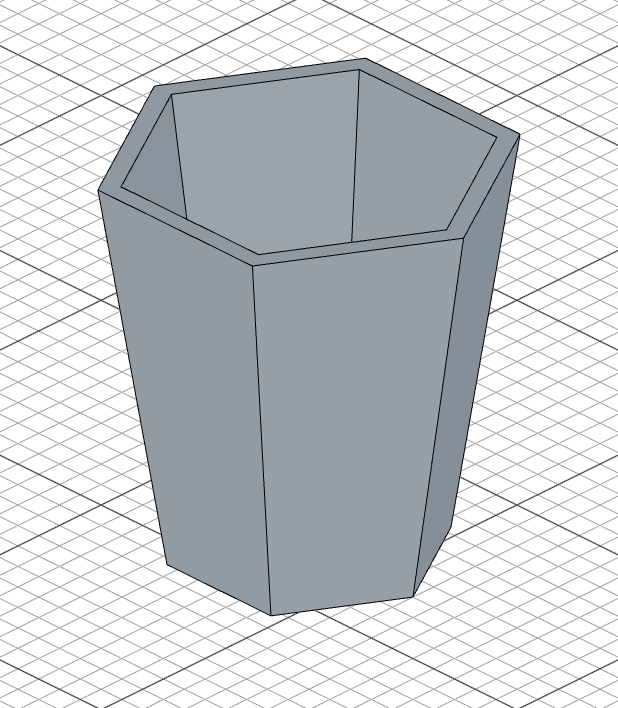
Shell it hollow
Select the top and bottom faces, then shell the body to create hollow walls:
select(
    face().onPlane("xy", middleHeight + 24),
    face().onPlane("xy", 24),
);

shell(-wallThickness)
face().onPlane("xy", middleHeight + 24) finds the top face (at height 174), and face().onPlane("xy", 24) finds the bottom face. These two faces are removed, and the rest of the solid is hollowed out with walls of wallThickness (7 units).
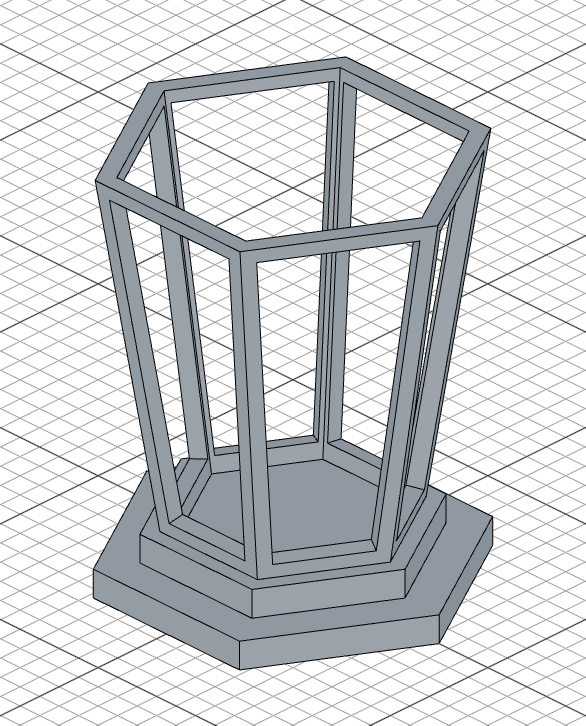
Step 2: Cut the windows
Each side of the lantern gets a window. We'll create one window and repeat it around the body.
Project and offset
To create a window that fits exactly within a side face, we project the face outline onto a sketch, then offset it inward:
sketch(middle.sideFaces(0), () => {
    project(middle.sideFaces(0))
    offset(-windowOffset, true)
})
middle.sideFaces(0)gives us the first side face of the hexagonal body — we use it both as the sketch plane and as the geometry to project.project()traces the face's outline onto the sketch.
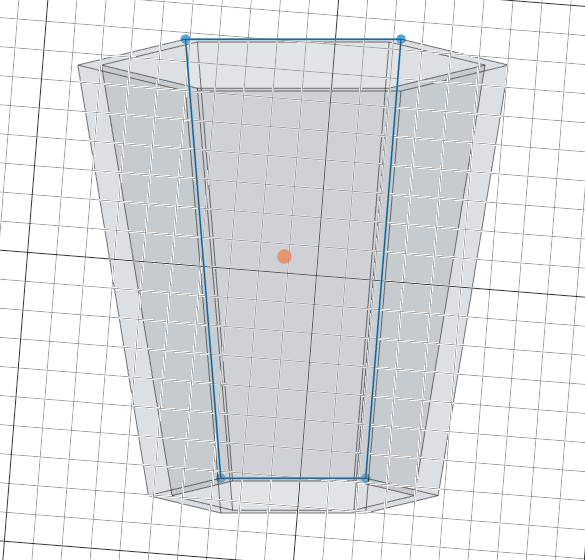
offset(-windowOffset, true)shrinks the outline inward by 6 units. Thetrueremoves the original projected outline, leaving only the inset shape.
Cut and repeat
Cut through the wall, then repeat the cut for all sides:
const c = cut(7)

repeat("circular", "z", {
    count: sides,
    offset: 360 / sides
})
cut(7) removes 7 units of material (matching the wall thickness). The repeat("circular") re-applies this cut around the Z axis, once for each side of the hexagon. count includes the original, so sides gives us one cut per face.

Step 3: The base
The base is two stacked hexagonal layers — a wider bottom tier and a narrower upper tier.
sketch("xy", () => polygon(sides, 150));

const pl1 = extrude(12)

sketch(pl1.endFaces(), () => polygon(sides, 115));

extrude(12)
- The first
sketch("xy", () => polygon(sides, 150))draws a hexagon with diameter 150 on the XY plane. extrude(12)creates a 12-unit tall base slab. It auto-fuses since we didn't use.new().- The second hexagon (diameter 115) is drawn on the top face of the first layer (
pl1.endFaces()), then extruded another 12 units. This creates a stepped base.
Step 4: The top
The top mirrors the base with a wider cap, then lofts up to a narrow tip.
Cap and tip
const topPlane = plane("xy", { offset: middleHeight + 24 });
sketch(topPlane, () => polygon(sides, 165));

const top = extrude(12)

sketch(plane(topPlane, { offset: 52 + 12 }), () => polygon(sides, 50));

const tip = extrude(12)
topPlaneis positioned at the top of the middle body (height 174).- A wide hexagon (diameter 165) is extruded 12 units to form the cap.
- A small hexagon (diameter 50) is placed 64 units above
topPlaneand extruded 12 units for the tip.
Loft between cap and tip
loft(top.endFaces(), tip.startFaces())
loft() creates a smooth transition between the top of the cap and the bottom of the tip. This forms the sloped roof of the lantern.
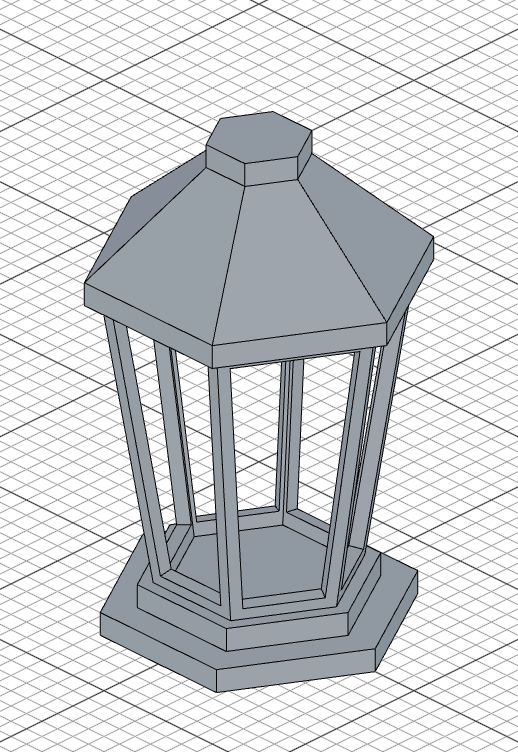
Step 5: The ring and handle
Finally, a small sphere sits on top, and a ring loops above it as a handle.
Sphere
let s = sphere(25 / 2)
translate([0, 0, 257], s)
A small sphere (diameter 12.5) is placed at the very top of the lantern at height 257.
Ring
const ringAxis = axis("y", { offsetZ: 290 })

sketch("yz", () => {
    circle([0, 290 + (65 / 2) - (7 / 2)], 7)
});

revolve(ringAxis).new()
axis("y", { offsetZ: 290 })creates a Y-axis shifted up to height 290 — this is the center of the ring.- A small circle (diameter 7) is sketched on the YZ plane, positioned to form the ring's cross-section.
revolve(ringAxis)rotates this circle around the offset axis, creating a torus (ring). The.new()keeps it separate from the rest.
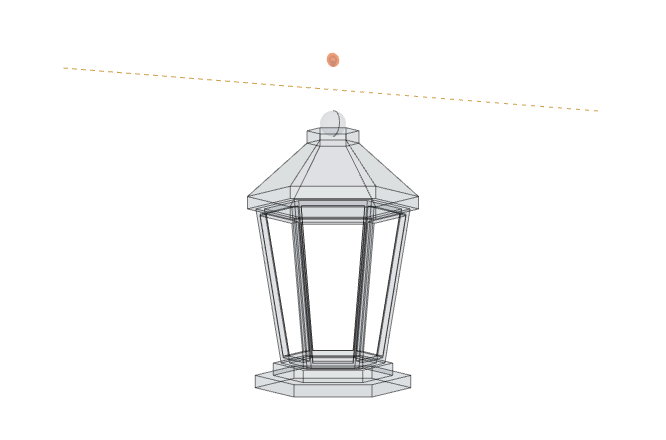
Change the sides variable to any even number ≥ 4 (e.g. 4, 6, 8) and the whole lantern — body, windows, base, top, and loft — adapts automatically.
Full code
import {
    axis, circle, color, cut, extrude, loft, move, offset,
    plane, polygon, project, repeat, revolve, select, shell,
    sketch, sphere, translate
} from 'fluidcad/core';
import { face } from 'fluidcad/filters';

const sides = 6;
const draft = 8;
const windowOffset = 6;
const wallThickness = 7;
const middleHeight = 150;

// Middle Body
sketch(plane("xy", { offset: 24 }), () => {
    polygon(sides, 100);
})

const middle = extrude(middleHeight).draft(draft).new()

select(
    face().onPlane("xy", middleHeight + 24),
    face().onPlane("xy", 24),
);

shell(-wallThickness)

// Cut Windows
sketch(middle.sideFaces(0), () => {
    project(middle.sideFaces(0))
    offset(-windowOffset, true)
})

const c = cut(7)

repeat("circular", "z", {
    count: sides,
    offset: 360 / sides
})

// Base
sketch("xy", () => polygon(sides, 150));

const pl1 = extrude(12)

sketch(pl1.endFaces(), () => polygon(sides, 115));

extrude(12)

// Top
const topPlane = plane("xy", { offset: middleHeight + 24 });
sketch(topPlane, () => polygon(sides, 165));

const top = extrude(12)

sketch(plane(topPlane, { offset: 52 + 12 }), () => polygon(sides, 50));

const tip = extrude(12)

loft(top.endFaces(), tip.startFaces())

// Ring & Handle
let s = sphere(25 / 2)
translate([0, 0, 257], s)

const ringAxis = axis("y", { offsetZ: 290 })

sketch("yz", () => {
    circle([0, 290 + (65 / 2) - (7 / 2)], 7)
});

revolve(ringAxis).new()
What you practiced
- Parametric variables — defining dimensions at the top so the whole model adapts when you change a value
plane()with offset — positioning sketches at specific heightspolygon()— creating hexagonal profiles.draft()— tapering an extrusion.new()— preventing auto-fusion to keep parts separateselect()+shell()— hollowing a solid by removing specific facesproject()+offset()— tracing a face outline and shrinking it for window cutoutsrepeat("circular")— repeating a cut around an axisloft()— smoothly connecting two faces at different heightsaxis()with offset +revolve()— creating a ring (torus) by revolving a circle around an offset axis