Building a Drafted Box
In this tutorial, you'll build a shelled box with a drafted central pipe and four drafted ribs, based on the original design by Too Tall Toby. It covers drafted extrudes, plane offsets, shelling with face filters, drafted cuts, the rib() feature, and circular patterns.
Create a new file called drafted-box.fluid.js in your project.
Setup
Start with the imports. This model uses core operations together with edge and face filters.
import { circle, cut, extrude, fillet, plane, repeat, rib, select, shell, sketch, line } from "fluidcad/core";
import { edge, face } from "fluidcad/filters";
import { coincident, distance, fix, horizontal, vertical } from "fluidcad/constraints";
fluidcad/core— modeling operations (sketch, extrude, cut, shell, fillet, rib, repeat, etc.) and sketch primitivesfluidcad/filters—edgeandfaceselection filters used to pick faces and edges by planefluidcad/constraints— constraint statements (coincident,horizontal,distance, …) that tell the sketch solver how the drawn geometry relates
Step 1: Drafted base box
Sketch the footprint on an offset plane
The base footprint sits on a plane offset 1.5 above the top plane — that way the body extrudes downward through the origin instead of starting at it.
sketch(plane("top", 1.50), () => {
    const sg1 = line([-3.5, -2.5], [3.5, -2.5]);
    const sg2 = line([3.5, -2.5], [3.5, 2.5]);
    const sg3 = line([3.5, 2.5], [-3.5, 2.5]);
    const sg4 = line([-3.5, 2.5], [-3.5, -2.5]);
    coincident(sg1.end(), sg2.start());
    coincident(sg2.end(), sg3.start());
    coincident(sg3.end(), sg4.start());
    coincident(sg4.end(), sg1.start());
    horizontal(sg1);
    vertical(sg2);
    horizontal(sg3);
    vertical(sg4);
    fix(sg1.start(), [-3.5, -2.5]);
    distance(sg1.start(), sg1.end(), 7);
    distance(sg2.start(), sg2.end(), 5);
  });
plane("top", 1.50) builds a plane parallel to "top" and offset 1.5 along its normal. The true after the callback makes this a constraint sketch: the four line() statements draw a 7×5 rectangle centered on the origin, and the constraints pin it down — coincident joins the corners, horizontal/vertical square the sides, fix anchors one corner, and the two distance dimensions set the width and height. With those in place the rectangle is fully constrained: the solver reports zero remaining degrees of freedom, and editing either distance value resizes the whole footprint.

Extrude with draft and round the edges
const base = extrude(-1.5).draft(-8);

fillet(.750, base.sideEdges())
fillet(.50, select(edge().onPlane("top")))
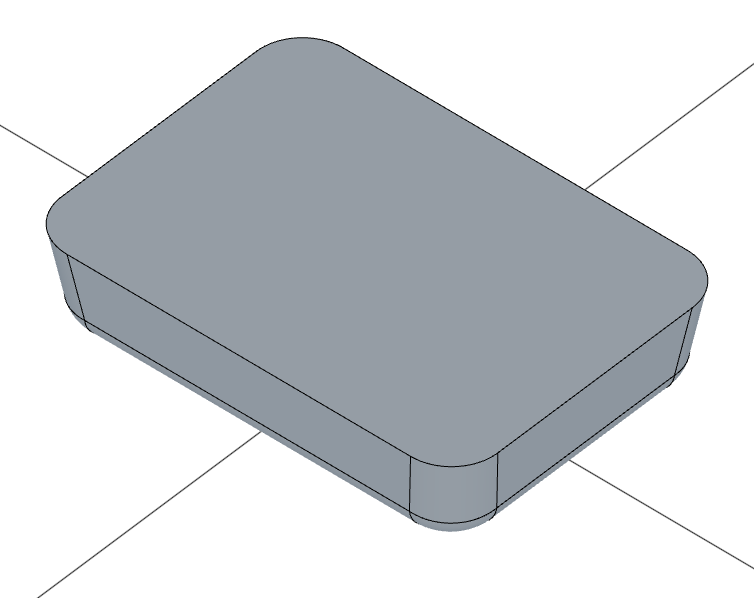
extrude(-1.5) pushes the rectangle 1.5 units downward (along the negative plane normal). .draft(-8) tapers the side walls inward at 8° — a negative draft narrows the body as the extrude advances, giving the box its trapezoidal silhouette.
fillet(.750, base.sideEdges()) rounds the four vertical corners of the box with a 0.75 radius. select(edge().onPlane("top")) picks every edge that lies on the top plane (the top rim of the now-trapezoidal box, since its top face sits exactly on "top"), and fillet(.50) rounds those with a 0.5 radius.
Step 2: Shell the top
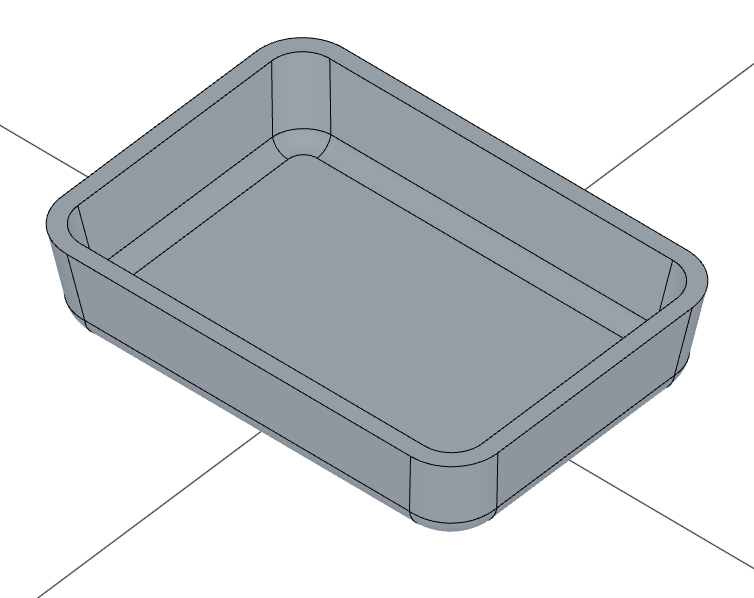
shell(-.250, select(face().onPlane("top", 1.5)))
select(face().onPlane("top", 1.5)) picks the face that sits on the offset plane used in step 1 — the top face of the box. shell(-.250) hollows the body inward with a 0.25 wall thickness, removing the selected face so the box opens upward.
Step 3: Drafted pipe body
Sketch the pipe footprint
sketch(plane("top", 2), () => {
    circle([0, 0], 2);
  });
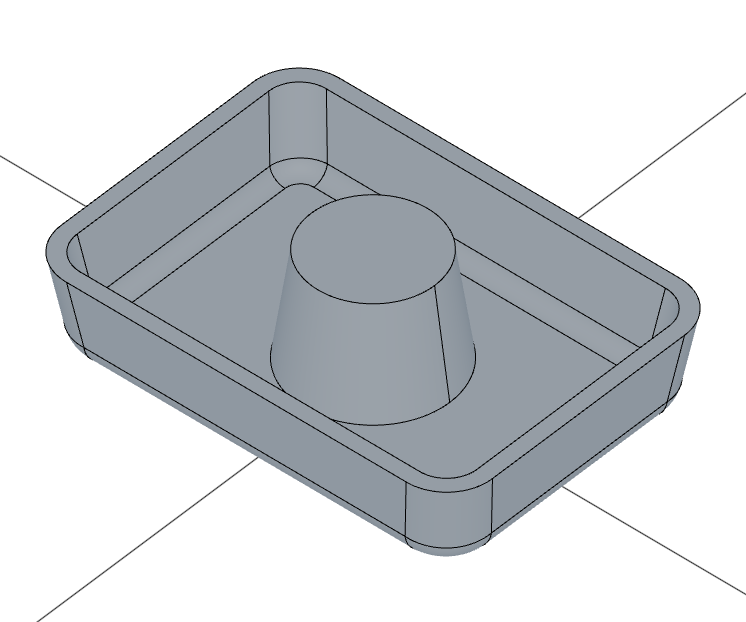
A new offset plane at "top" + 2 hosts a circle of diameter 2 centered on the origin — in a constraint sketch the center is spelled out rather than inherited from a cursor. Putting the sketch above the box means the resulting extrude will pass through the open top and seat itself inside the shell.

Extrude with positive draft
const pipeBody = extrude(-2).draft(8);
extrude(-2) pushes the circle 2 units downward. .draft(8) is a positive draft — the opposite of the box. Where negative draft narrows the body in the direction of travel, positive draft widens it, so the pipe flares outward as it descends into the box.
Step 4: Drafted pipe hole
Sketch the hole on the pipe's top face
sketch(pipeBody.startFaces(), () => {
    circle([0, 0], 1.5);
  });
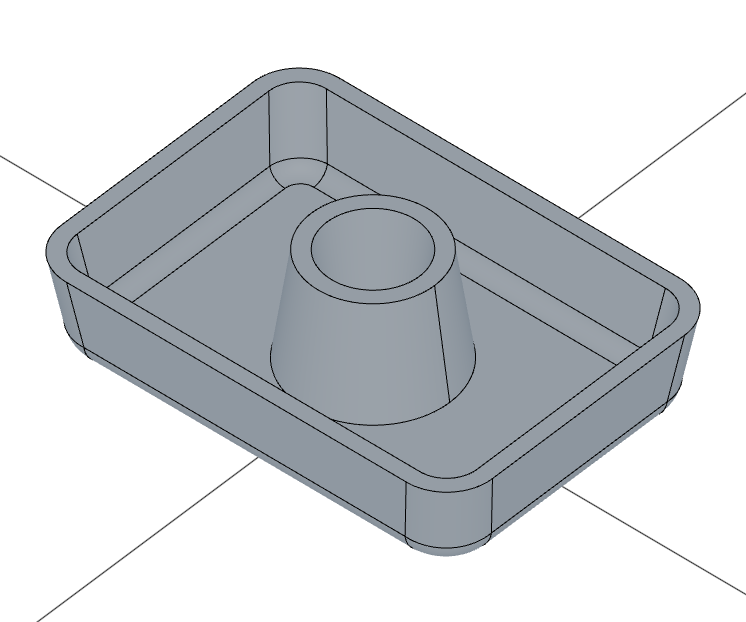
pipeBody.startFaces() returns the face the pipe extrude started from — its flat top. A face sketch puts its local origin at the face's center, so circle([0, 0], 1.5) places a diameter-1.5 circle exactly on the pipe's axis.

Cut with draft
cut().draft(-8);
cut() with no depth runs the cut as far as the underlying body allows. .draft(-8) tapers the cut walls inward at 8° — the same draft angle as the pipe's outer wall, so the bore narrows as it descends and stays parallel to the pipe's outside surface.
Step 5: Add a rib
Sketch the rib spine
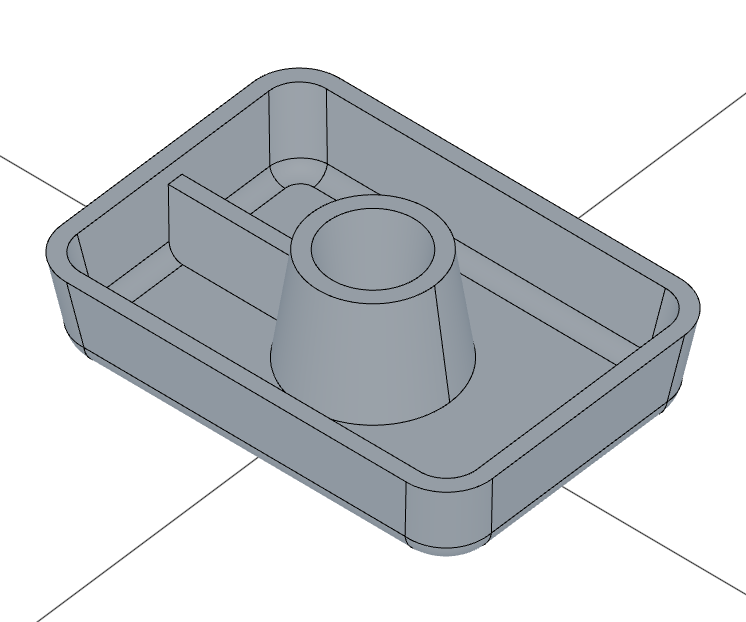
A single line on the front plane defines where the rib sits between the pipe and the inner box wall.
sketch("front", () => {
    const sg5 = line([-2, 1.25], [-1.5, 1.25]);
    horizontal(sg5);
  });
The line from [-2, 1.25] to [-1.5, 1.25] is a half-unit segment on the front plane — that's the rib's spine — and the horizontal constraint records that it must stay level. It doesn't need to span the full gap between the pipe and the wall; .extend() will take care of that in the next step.

Build the rib
rib(.25).parallel().extend().draft(-8)
rib(.25) builds a 0.25-thick rib from the spine. The chained calls do the heavy lifting:
.parallel()— extrudes the rib in-plane (perpendicular to the spine within the front plane) instead of normal to the sketch. The result is an upright wall standing inside the box rather than a flat strip lying on the front plane..extend()— pushes the spine endpoints outward until they meet the surrounding solids: the inner box wall on one side, the pipe's curved surface on the other. This is why the spine line itself only needs to be a small seed — the rib finds its own length..draft(-8)— widens the rib by 8° as it descends, matching the box's inward draft so the rib's outer edges stay flush with the cavity walls.
Step 6: Pattern the rib
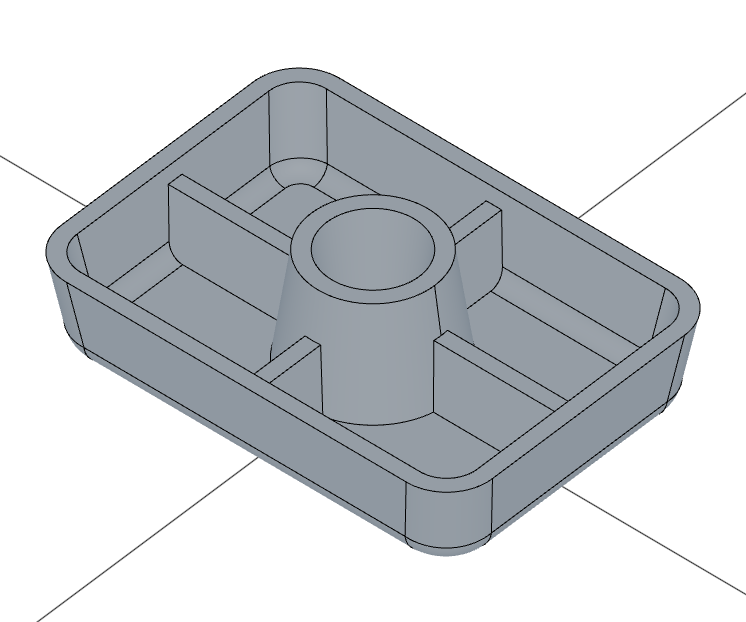
repeat("circular", "z", {
    count: 4,
    angle: 360
})
repeat("circular", "z", { count: 4, angle: 360 }) rotates the most recent operation — the rib — around the Z axis four times for a full revolution. Called with no trailing target arguments, repeat automatically picks up the last operation in the scene, so a single line completes the four-rib arrangement.
Full code
Open this model in the 3D viewer// @screenshot waitForInput
import { circle, cut, extrude, fillet, plane, repeat, rib, select, shell, sketch, line } from "fluidcad/core";
import { edge, face } from "fluidcad/filters";
import { coincident, distance, fix, horizontal, vertical } from "fluidcad/constraints";
sketch(plane("top", 1.50), () => {
const sg1 = line([-3.5, -2.5], [3.5, -2.5]);
const sg2 = line([3.5, -2.5], [3.5, 2.5]);
const sg3 = line([3.5, 2.5], [-3.5, 2.5]);
const sg4 = line([-3.5, 2.5], [-3.5, -2.5]);
coincident(sg1.end(), sg2.start());
coincident(sg2.end(), sg3.start());
coincident(sg3.end(), sg4.start());
coincident(sg4.end(), sg1.start());
horizontal(sg1);
vertical(sg2);
horizontal(sg3);
vertical(sg4);
fix(sg1.start(), [-3.5, -2.5]);
distance(sg1.start(), sg1.end(), 7);
distance(sg2.start(), sg2.end(), 5);
});
const base = extrude(-1.5).draft(-8);
fillet(.750, base.sideEdges())
fillet(.50, select(edge().onPlane("top")))
shell(-.250, select(face().onPlane("top", 1.5)))
sketch(plane("top", 2), () => {
circle([0, 0], 2);
});
const pipeBody = extrude(-2).draft(8);
sketch(pipeBody.startFaces(), () => {
circle([0, 0], 1.5);
});
cut().draft(-8);
sketch("front", () => {
const sg5 = line([-2, 1.25], [-1.5, 1.25]);
horizontal(sg5);
});
rib(.25).parallel().extend().draft(-8)
repeat("circular", "z", {
count: 4,
angle: 360
})
What you practiced
plane("top", offset)— building a sketch plane parallel to a principal plane at a given offsetextrude().draft(angle)— tapering an extrude's side walls; negative draft narrows, positive draft widenscut().draft(angle)— applying the same taper to a cut for matched-angle boresselect(face().onPlane(...))/select(edge().onPlane(...))— picking faces or edges by the plane they lie onshell(thickness, face)— hollowing a body and removing a selected face to open itrib(thickness).parallel().extend().draft(...)— building a stiffening wall from a short spine line that auto-extends to surrounding solidsrepeat("circular", "z", ...)— circular-patterning the previous operation around an axis