Compound Geometries
Compound geometries create complete, closed profiles in a single call. They are ready to extrude right away.
rect
sketch("xy", () => {
    rect(100, 60)              // 100 wide, 60 tall, starting at current position
    rect(80)                   // 80x80 square
    rect([10, 20], 50, 30)    // 50x30 rectangle starting at position [10, 20]
})
Useful methods on rect:
import { sketch } from 'fluidcad/core';
import { rect } from 'fluidcad/core';

sketch("xy", () => {
    rect(100, 60).centered().radius(5)
})

You can also access individual edges of a rect:
const r = rect(100, 60)
r.edge('top')      // the top edge
r.edge('bottom')   // the bottom edge
r.edge('left')     // the left edge
r.edge('right')    // the right edge
polygon
import { sketch } from 'fluidcad/core';
import { polygon } from 'fluidcad/core';

sketch("xy", () => {
    polygon(6, 80)
})

slot
An obround shape (rectangle with rounded ends):
import { sketch } from 'fluidcad/core';
import { slot } from 'fluidcad/core';

sketch("xy", () => {
    slot(100, 30)
})

Slots always build along the sketch's local X axis. To orient them differently, pass a rotation angle in degrees:
slot(100, 20).rotate(45); // rotate the slot's primary axis by 45°
Slot from edge
You can create a slot that follows an existing edge or arc. Pass the geometry as the first argument and the width as the second:
import { sketch } from 'fluidcad/core';
import { move, arc, slot } from 'fluidcad/core';

sketch("xy", () => {
    move([100, 0])
    const a = arc(90, 0, 90)
    slot(a, 20, true)
})

The third argument (true) removes the source geometry after creating the slot. Set it to false to keep the original edge.
text
text() turns a string into outline geometry — each letter becomes a closed profile you can extrude into 3D lettering. Use it inside a sketch() with text("Hello"). The size is the cap height in model units; thickness comes from extrude().
// @screenshot waitForInput
import { sketch, text } from 'fluidcad/core';

sketch("xy", () => {
    text("Hello").size(20)
})

Fonts and weight
By default text() uses a system font. Pass a system font name to .font(), or a workspace-relative font file ending in .ttf/.otf (e.g. .font("fonts/Brand.ttf")). Control the typeface with .weight() ("regular", "bold", or a number 100–900) and .italic():
// @screenshot waitForInput
import { sketch, text } from 'fluidcad/core';

sketch("xy", () => {
    text("Serif").size(20).font("Times New Roman").weight("bold")
})

If the named font isn't installed, FluidCAD substitutes the closest match (e.g. "Arial" → a system sans-serif) and ultimately falls back to a default font.
Extruding text
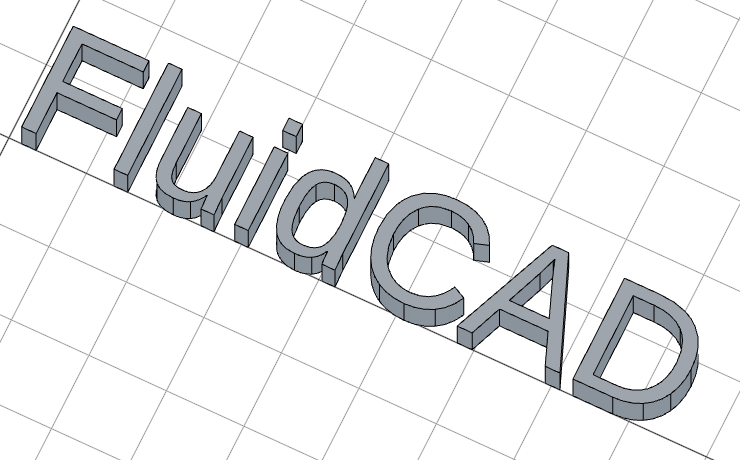
Because text() is ordinary sketch geometry, you extrude it like any other profile — the counters (the holes in o, e, A, …) are kept automatically:
// @screenshot waitForInput
import { sketch, text, extrude } from 'fluidcad/core';

sketch("xy", () => text("FluidCAD").size(20))
extrude(6)
For multi-line strings (\n), set .align("left" | "center" | "right"), and fine-tune spacing with .lineSpacing() and .letterSpacing().
Text along a path
text(string, path) lays the glyphs along a curve instead of a straight baseline. The path can be a curve in the same sketch, a whole sketch (e.g. sketch("xy", () => circle(80))), or edges selected from existing geometry (e.g. select(edge().circle()) for a cylinder rim). The path must be planar; the text lies in the path's plane.
// @screenshot waitForInput
import { arc, extrude, sketch, text } from 'fluidcad/core';

sketch("xy", () => {
  const path = arc([0, 0], [100, 0]).center([50, -120]).cw().guide();
  text("CURVED TEXT", path).size(12).align("center");
});
extrude(4);
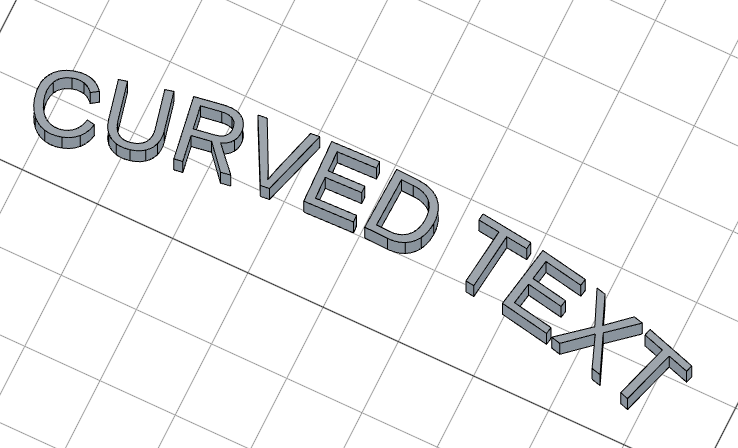
The path itself stays in the scene — several texts can share one path. When the path lives in the same sketch, mark it .guide() so the curve stays out of the extruded profile; text follows guide curves just fine.
Glyph spacing is measured as arc length, so kerning and .letterSpacing() behave exactly like straight text. To slide the text start along the path by an arc-length distance, use .startAt(d).
Aligning on a path
.align() positions the run against the path ("left" and "right" work as synonyms of "start" and "end"):
import { arc, sketch, text } from 'fluidcad/core';

sketch("xy", () => {
  const path = arc([0, 0], [180, 0]).center([90, -216]).cw().guide();
  text("start", path).size(14).align("start");
});
"start" (the default) begins the text at the path's start:

"center" centers it on the path's midpoint:

"end" finishes at the path's end:

"space-between" justifies the glyphs evenly across the whole path, first glyph at the start and last at the end:

"space-around" also distributes the glyphs evenly, but with half a gap before the first glyph and after the last — like the CSS flexbox value:

Outside or inside: flip
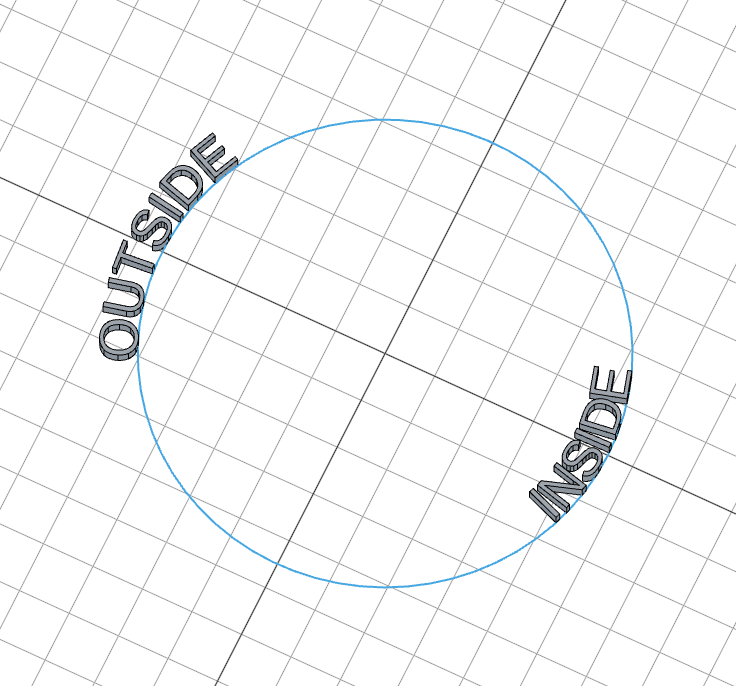
On a closed path (a full circle) the text wraps around and sits on the outside by default — "space-between" and "space-around" then space the glyphs evenly around the loop. .flip() mirrors the text to the other side of the path and reverses the reading direction: on a circle it moves the text inside; on an open curve it mirrors the text below the path:
// @screenshot waitForInput
import { sketch, circle, extrude, text } from 'fluidcad/core';

const ring = sketch("xy", () => circle(90));
const outside = text("OUTSIDE", ring).size(10).align("center");
// startAt(141) ≈ half the circumference: badge-style text on the far side.
const inside = text("INSIDE", ring).size(10).align("center").flip().startAt(141);
extrude(3, outside);
extrude(3, inside);
Floating off the path: offset
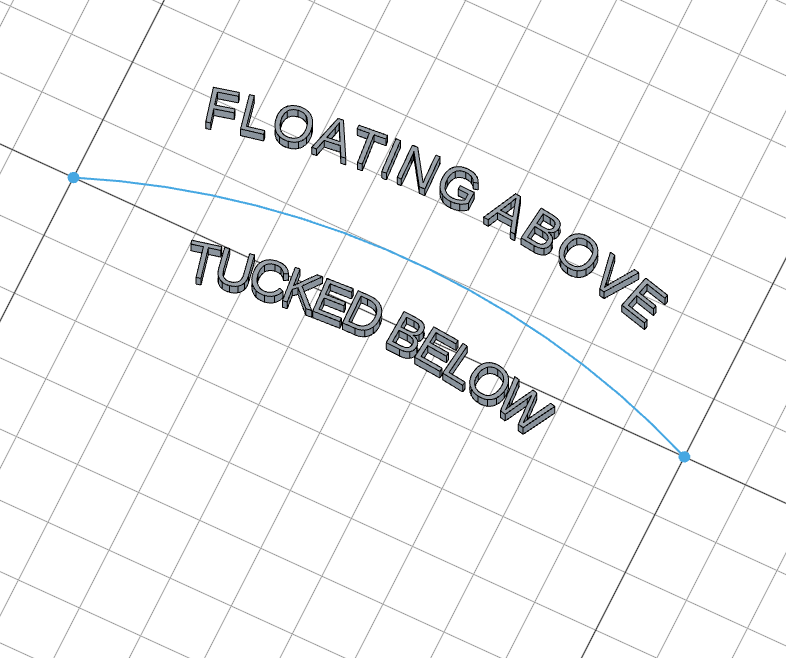
.offset(d) shifts the baseline perpendicular to the path — positive values float the text above the curve, negative values tuck it below:
// @screenshot waitForInput
import { arc, extrude, sketch, text } from 'fluidcad/core';

const path = sketch("xy", () => {
  arc([0, 0], [100, 0]).center([50, -120]).cw();
});
const above = text("FLOATING ABOVE", path).size(8).align("center").offset(10);
const below = text("TUCKED BELOW", path).size(8).align("center").offset(-14);
extrude(3, above);
extrude(3, below);